Beginner Yoga Routine: A Gentle 20-Minute Start
- What this 20-minute routine is for
- Set up before the timer starts
- Minutes 0–2: arrive without performing
- Minutes 2–4: Cat–Cow, gently
- Minutes 4–6: Table to a supported Child's Pose
- Minutes 6–10: low lunges on both sides
- Minutes 10–13: Mountain and a small Chair Pose
- Minutes 13–15: balance with an escape route
- Minutes 15–18: bridge and a simple twist
- Minutes 18–20: rest on purpose
- How to repeat the routine
What this 20-minute routine is for
This beginner yoga routine is a first conversation with a few common movements, not a final exam conducted by your hamstrings. It combines easy floor work, a short standing section, balance, and rest. You can make every shape smaller, use support, or leave one out.
The timing adds up like this:
- arrive and breathe: 2 minutes;
- Cat–Cow: 2 minutes;
- Table to Child's Pose: 2 minutes;
- low lunges: 4 minutes;
- standing poses: 3 minutes;
- balance: 2 minutes;
- movements on your back: 3 minutes; and
- final rest: 2 minutes.
That is 20 minutes, although moving a cushion and negotiating with a curious pet may introduce local variations.
This is general practice guidance, not treatment for pain or a health condition. The US National Center for Complementary and Integrative Health says yoga is generally considered safe for healthy people when done properly, but injuries can occur. Its yoga safety guidance recommends qualified instruction, starting with appropriate practices, and discussing individual needs when pregnancy, age, injuries, balance issues, or health conditions may require changes.
Set up before the timer starts
Clear enough space to extend an arm or leg without striking furniture. Use a nonslip mat or stable surface. Keep a wall or sturdy stationary chair nearby for balance. A folded blanket can cushion knees or support the head; one or two blocks can bring the floor closer. If you are wondering what blocks actually do, our guide to using yoga blocks turns those mysterious rectangles into practical tools.
Wear clothing that allows movement and normal breathing. Silence notifications if you can. Yoga has survived for centuries without knowing that somebody has reacted to the group chat.
Move within a range you can control. Ordinary muscular effort and a mild stretch sensation can occur, but sharp, sudden, pinching, escalating, or unfamiliar pain is a reason to stop. So are numbness, dizziness, faintness, or breathing difficulty beyond ordinary exertion. Do not hold your breath to make a shape look calm.
Minutes 0–2: arrive without performing
Sit on a folded blanket or chair, or lie on your back with knees bent. Choose the position in which you can breathe comfortably.
Notice three things: where your body contacts the floor or chair, whether your jaw is gripping, and how the breath moves without being forced. Let your hands rest. Take several ordinary breaths, then allow the exhalation to become a little slower if that feels easy.
There is no need to produce an ocean sound, empty the mind, or become briefly luminous. You are checking in. A busy mind has not invalidated the booking.
Minutes 2–4: Cat–Cow, gently
Come to hands and knees. Place hands roughly under shoulders and knees roughly under hips, adjusting for comfort. If kneeling is uncomfortable, fold the mat or place a blanket under the knees. If hands-and-knees loading does not suit you, sit in a chair and perform the same spinal movements with hands on thighs.
As you inhale, tip the pelvis slightly, let the chest move forward, and make a modest arch. Keep the back of the neck long instead of throwing the chin upward. As you exhale, press the floor away, round the back gently, and let the head follow.
Repeat slowly for about two minutes. The movement does not need to be large. Imagine the spine moving segment by segment rather than snapping between two dramatic photographs.
Minutes 4–6: Table to a supported Child's Pose
Return to a neutral hands-and-knees position. Send the hips back toward the heels, then come forward again. The knees may be together or wider. The hips do not need to reach the heels.
If moving back feels comfortable, pause for a breath or two with the arms forward. Place a folded blanket behind the knees, support the torso on pillows, or keep the hips higher if that reduces strain. If knee, ankle, or hip discomfort persists, stay in Table or sit back in a chair instead.
Repeat the forward-and-back movement several times. This is a useful place to learn a central practice skill: changing the pose before the pose starts sending formal complaints.
Minutes 6–10: low lunges on both sides
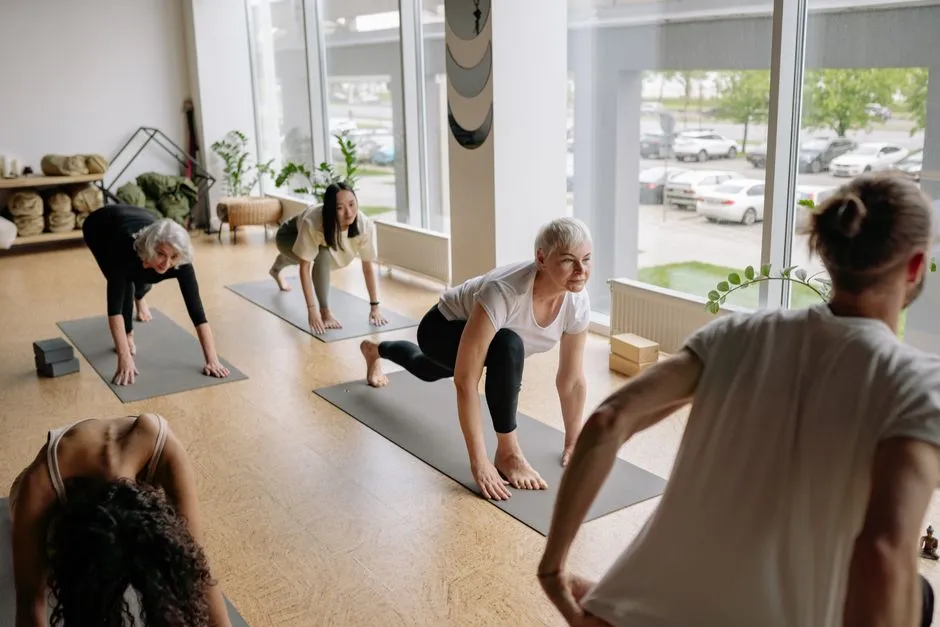
From hands and knees, bring the right foot forward between the hands. It is perfectly acceptable to pick up the ankle and help it along. Move the right foot wider if that creates room and balance. Keep the left knee on padding.
Place hands on blocks, on the front thigh, or on a sturdy chair. Bring the torso more upright only while the position remains steady. Let the front knee track generally in the same direction as the toes rather than collapsing inward.
Stay for a few breaths, then shift the hips back slightly and straighten the front leg only as far as comfortable. Keep a bend in the knee. Move between the lunge and the shifted-back position several times.
Return to hands and knees, change sides, and repeat. Split the four minutes roughly evenly. There is no prize for a deep lunge, and the committee has once again misplaced the medals.
Minutes 10–13: Mountain and a small Chair Pose
Use the chair or wall to rise to standing. Stand with feet at a comfortable width, not necessarily touching. Feel three broad points under each foot: the heel, the base of the big toe, and the base of the little toe. Let the knees remain easy rather than locked.
In Mountain Pose, arms may hang, reach forward, or lift overhead if the shoulders move comfortably. Take two or three breaths.
For a small Chair Pose, bend the knees and send the hips back as if approaching a chair. Keep the movement shallow. Press through the feet to stand. Repeat three to five times at a pace that allows normal breathing. You may literally place a chair behind you and tap the seat; practical furniture is not cheating.
Finish with an easy standing side bend. Lift one arm, lean slightly away, return, and change sides. Keep both feet grounded and the breath unforced.
Minutes 13–15: balance with an escape route
Stand beside a wall or behind a stable chair. Keep fingertips on the support. Shift weight into the left foot and lift the right heel, leaving the right toes down like a kickstand. If steady, float the foot an inch or two.
Hold for two or three breaths, lower, and change sides. Repeat once if time allows. Look at one unmoving point. A wobble is information about balance, not a character reference.
To make it easier, widen the standing foot, keep more fingers on the support, or leave the toes down. To make it more challenging later, reduce hand contact before increasing height or duration.
Minutes 15–18: bridge and a simple twist
Lower to the floor using the chair if helpful. Lie on your back with knees bent and feet planted. If lying flat is not suitable for you, choose the supported rest options in our guide to restorative yoga with household props.
For a small Bridge, press the feet down and lift the pelvis only a comfortable distance. Keep the throat and jaw easy. Lower slowly. Repeat three to five times; the lift can be tiny.
Then keep both feet down and let the knees drift a small distance to the right. Return through centre and move left. Continue side to side, or pause briefly on each side if that feels better. Do not press a knee toward the floor.
Minutes 18–20: rest on purpose
Stay on your back with knees bent, place the lower legs on a chair, or lie on one side with support under the head. Let the hands settle somewhere easy. If closing the eyes feels comfortable, do; otherwise soften your gaze.
Notice whether the breath, temperature, or contact with the floor feels different from the start. You do not need to manufacture a profound conclusion. Two minutes of doing less is already a complete activity.
Roll to one side before sitting up if that transition is comfortable. Move slowly and pause if you feel light-headed.
How to repeat the routine
On the next practice, repeat the same sequence before adding complexity. Familiarity frees attention: you can notice whether the stance is stable, whether the breath changes, and whether a modification helps.
If one section feels rushed, give it more time and shorten another. If floor transitions are the hardest part, practice the standing section near a chair and rest seated. A routine is a framework, not a small government.
Downward-Facing Dog is intentionally absent. It is common but often demanding for beginners. When you want to explore it, use the wall and chair variations in Downward Dog for beginners rather than assuming heels-down floor Dog is the compulsory sequel.
Practice should leave room for curiosity. You are learning movement, effort, support, and choice. That is plenty for 20 minutes—and a much better beginning than trying to win yoga on Tuesday.